

SO first here is what my Green dino looks like. (His name is Dinosaurus LOL)


Now I will be making the pink one for his girlfriend but you can make it any color you want!
Materials Needed Are....
1. Polymer clay of colors you will make your dino with. For mine I will need black for the eyes,
pink for the body, and white for the belly.

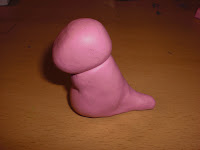
Making the Head.1. Roll your head clay in to a circle first.

2. Shape the head to the shape you want but mine will be shaped like this:
Now you are done for now.

3. Take the clay you will make the body with.

4. Roll the body clay in to a ball. The body should be bigger than the
head but not too big to make the head look tiny. Remember, this is a chibi dinosaur not a realistic
one ;)

5. Roll the clay into a chubby cylinder shape x]

6. Pull and shape the clay to make a tail in the back by pressing and pushing
the clay outwards and keeping the clay smooth.

7. Now shape the belly. It will be really cute to make the belly a lot more
bigger than the girl and make the chest for guys almost flat and girls a little less flat xD.


8. Now attatch the head. Becareful to not press too hard and gently press them together.

10. Now put the eyes on the dinosaur where you want it. *Tip- it's cuter if you spread the eyes
out away from each other quite a bit but don't spread it too far! (Or else it will look dumb
hahaha)
 11. Now roll a ball of white clay for the stomach.
12. Roll the ball of clay out in to a long oval and cut it down to fit your dinosaur from neck to
bottom of the belly.

13. Now place it on the dinosaur's stomach and rub the belly smooth to the front and sides.

 14. Cut out 4 chunks of clay for the arms and legs.
15. Shape in to arms and legs and put them on the dinosaur.
 16. Roll out a very thin or big (your choice) and cut it in small segments and lengths for your dinosaur's nails :)
 17. Make little triangles for the dinosaur's spikes and add last minute details!
 18. Gloss and bake....FINISHED :D I hope you enjoyed this tutorial and have fun making this! Thanks so much for reading and look out for more clay tutorials :)
cute cute
ReplyDelete